Introduction to Data Manager
An overview of the different features of Data Manager
Filters
Period filter
In order to filter out the relevant Activities, a Period filter needs to be applied and will filter the while view. This would typically be the whole period for the Activities you want to work with.
Sometimes you want to look at just a subset of the Activities, in which case you could modify this filter to show the subset.

Activity filters
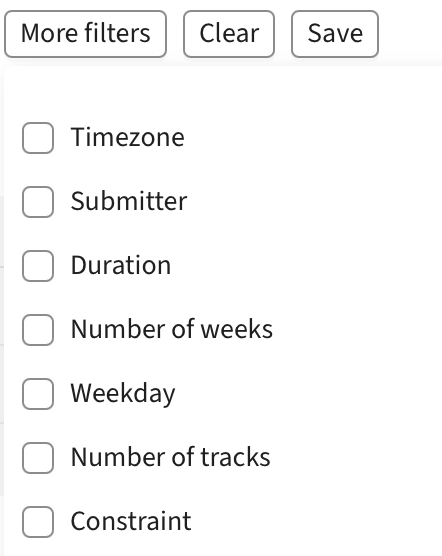
Besides the Period filter above, there are a number of filters that can be applied to find only the specific Activities you want to work on.

The standard filters are Course, Activity type, Status, Tag and Activity import. Additional standard filters can be found under the More filters button, and are always available.
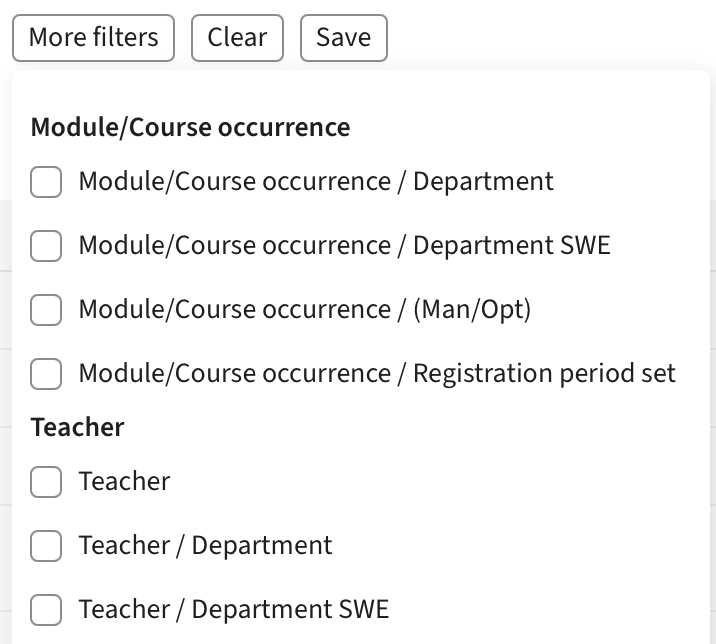
Besides these it is possible to filter on any Object or Field on the Activities, as well as Fields on the Objects.
Saving
It is possible to save a particular set of filters, to quickly get back to the same Activities. These filters are stored on the User and will not be shared with others.
Grouping
The Activities can be viewed in two different tables, one that shows whole Activity Series and one that shows individual Activities.

The individual Activities view can be useful when you want to change variations or replace a particular Object on some activities within a Series, without changing the whole series.
Activity series table
The most advanced view is the Activity Series table.
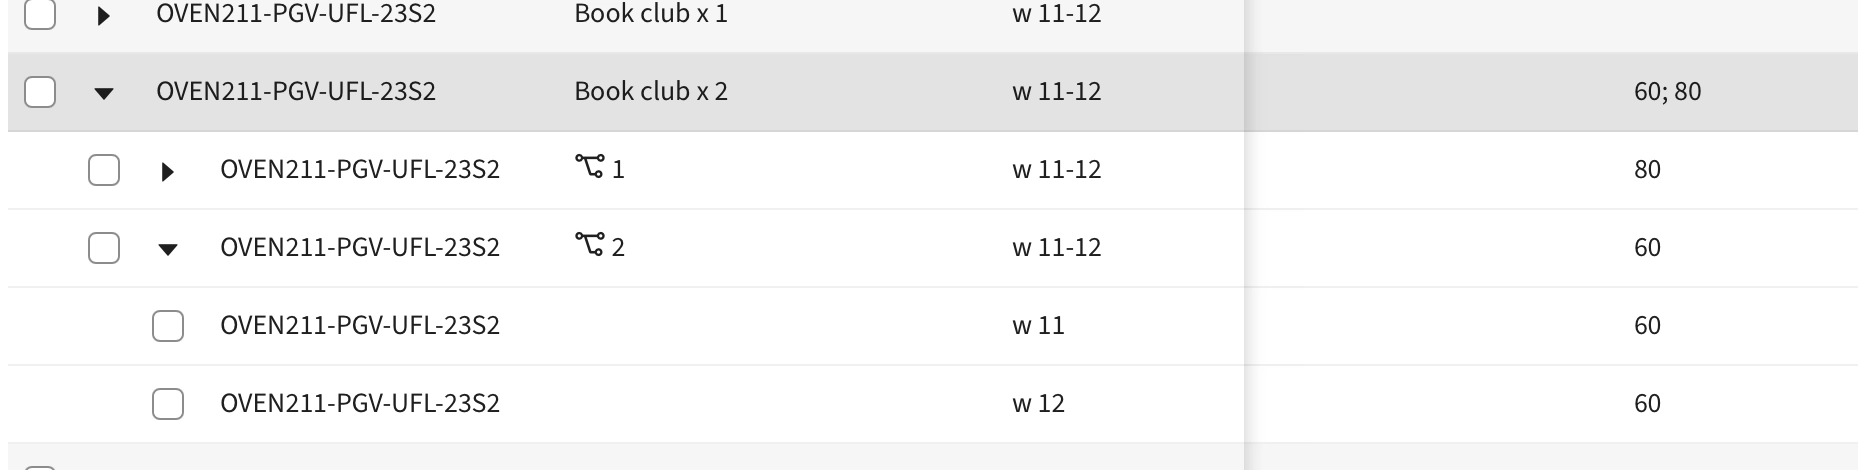
It groups Activities into three different levels, that the user can drill down into. The top level is Activity Series. An Activity Series is a set of Activities of the same type, in a Course Instance, that runs repeatedly over several weeks.
The next level is Tracks. An Activity Series can be split into multiple Tracks, if the Activity needs to be split into several smaller groups. Any one student would only attend one Track.
The Tracks can be further expanded to reveal each individual Activity per week for that particular Track

Edit columns
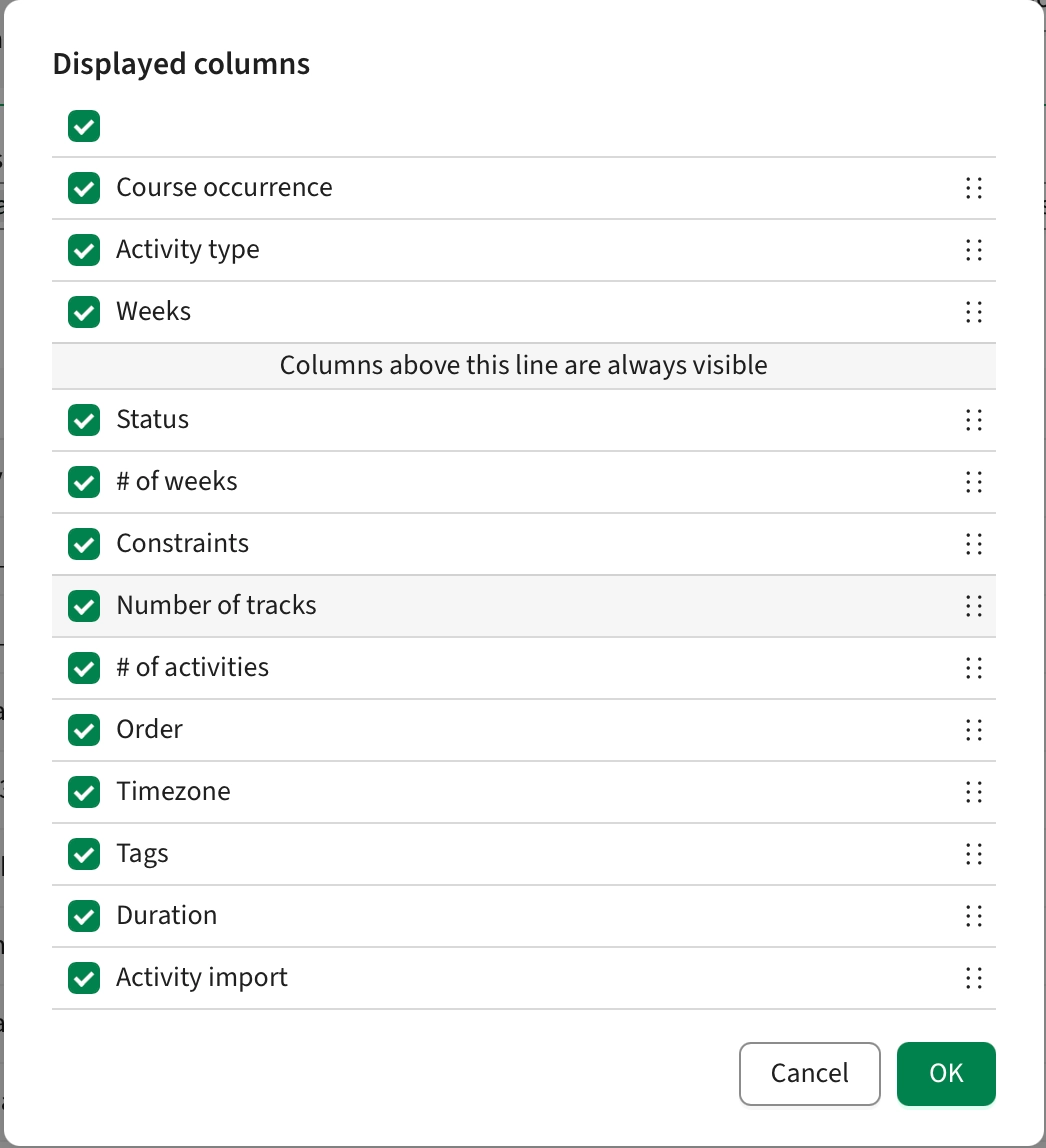
It’s possible to change which columns are visible in the table. Clicking the “Edit columns” button will bring up the Edit columns dialog. All columns are presented in a list and visibility can be turned on or off using the checkbox. The top checkbox checks or unchecks all columns.
It’s possible to drag the columns to the desired order
The columns above the divider will be “sticky”, i.e. they will always be visible in the table, even the user scrolls horizontally. Drag a column above the divider to make it sticky, or drag the divider to add multiple columns at once
Levels
In the Activity Series view grouping, there are three levels for each item in the list.
Activity Series
The first level is the Activity Series itself. This row “contains” all underlying Activities. The values presented in the table on this level is a concatenation of all the values in the underlying levels. So, for instance, if the underlying activities had two different values for Teacher, both Teachers will be presented in the table.
Tracks
Expanding the first level will reveal the underlying Tracks of the Activity Series. The data presented here is, just like the Activity Series, a concatenation of the underlying Activities
Activities
The last level reveals individual Activities in a specific Track, one per week.
Details drawer
Clicking on a row in the table will open the Details Drawer for that specific item. Opening an Activity Series, will allow users to update values for all included Activities. Opening a Track will allow the user to update values for all the Activities for that Track. Opening a single Activity will allow the user to update values for that Activity Only
Edit weeks
The weeks can be edited, but differs a little based on the selected item.
Single Activities
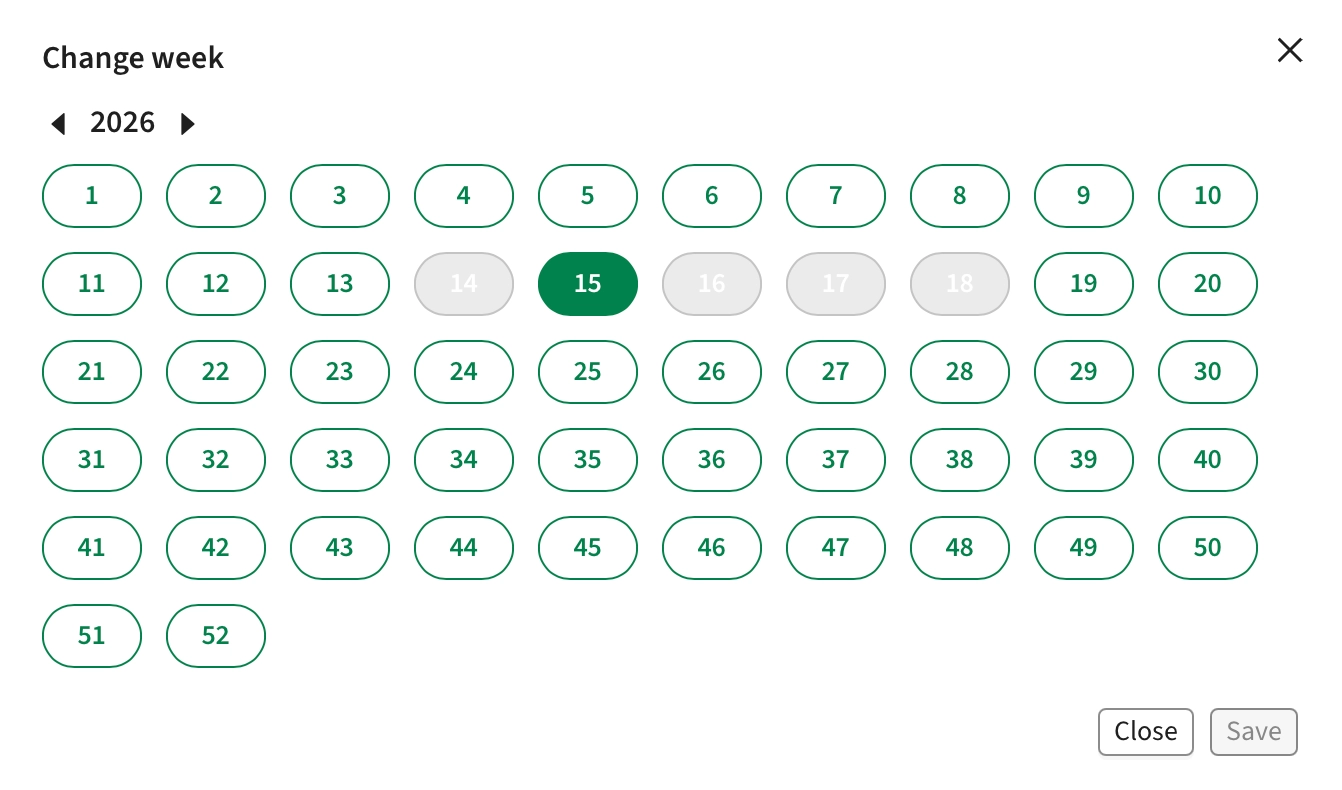
If selecting a single Activity, the week in which this activity occurs can be changed. This is essentially moving the Activity to a new week, but will keep the Activity in the same Track. It is not possible to select a week where there is already an Activity in the Track.
Track
Editing the weeks for a Track will add or remove Activities accordingly. When a week is added, a new Activity will be created with the values taken from the last Activity in the Track.
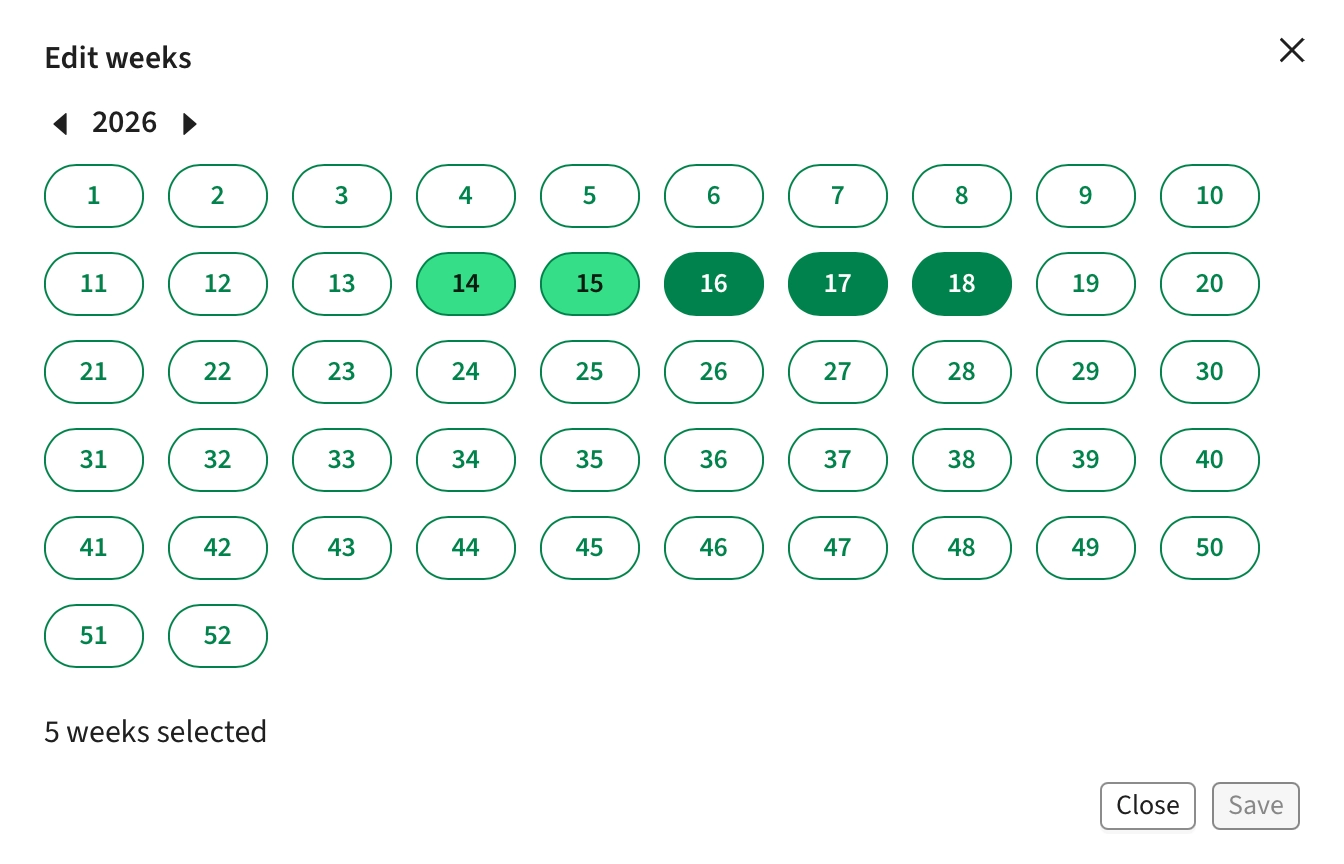
Activity Series
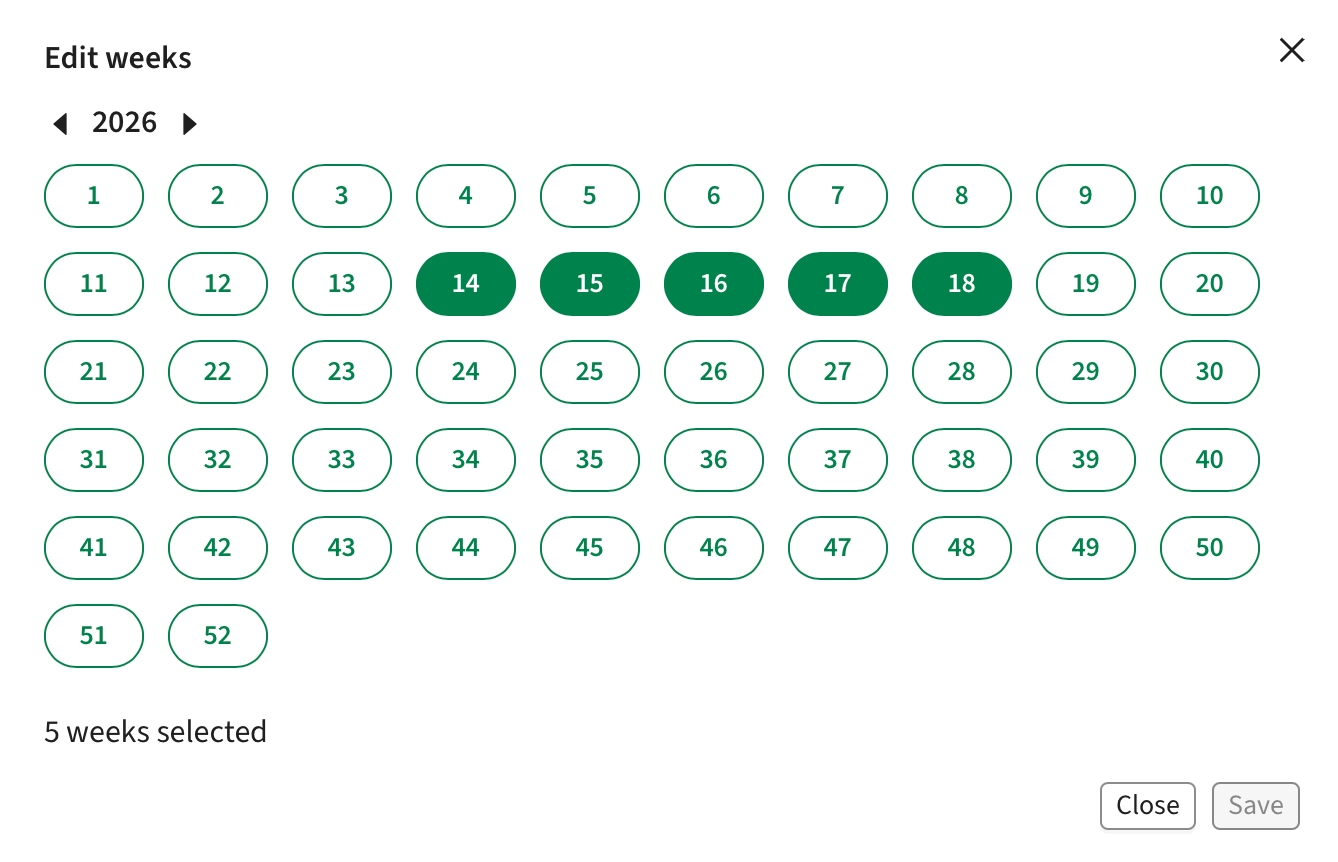
When editing the weeks for a whole Activity Series, it is only possible to add or remove weeks (i.e. Activities) for all the Tracks simultaneously. The interface will give the user a hint when not all Tracks occur in a specific week. Weeks where all Tracks have Activities are marked in dark green, while weeks where only some Tracks have Activities are marked in light green.
Adding or removing weeks in the view will add that week to all Tracks in the Series.
Edit Tracks (for Activity Series)
It is possible to add Tracks to an Activity Series.
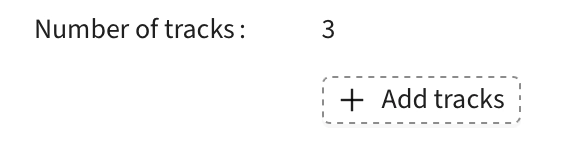
Clicking the Add tracks button will bring up a dialog allowing the user to create up to 9 new Tracks (if more Tracks are desired, the operation can be done multiple times).
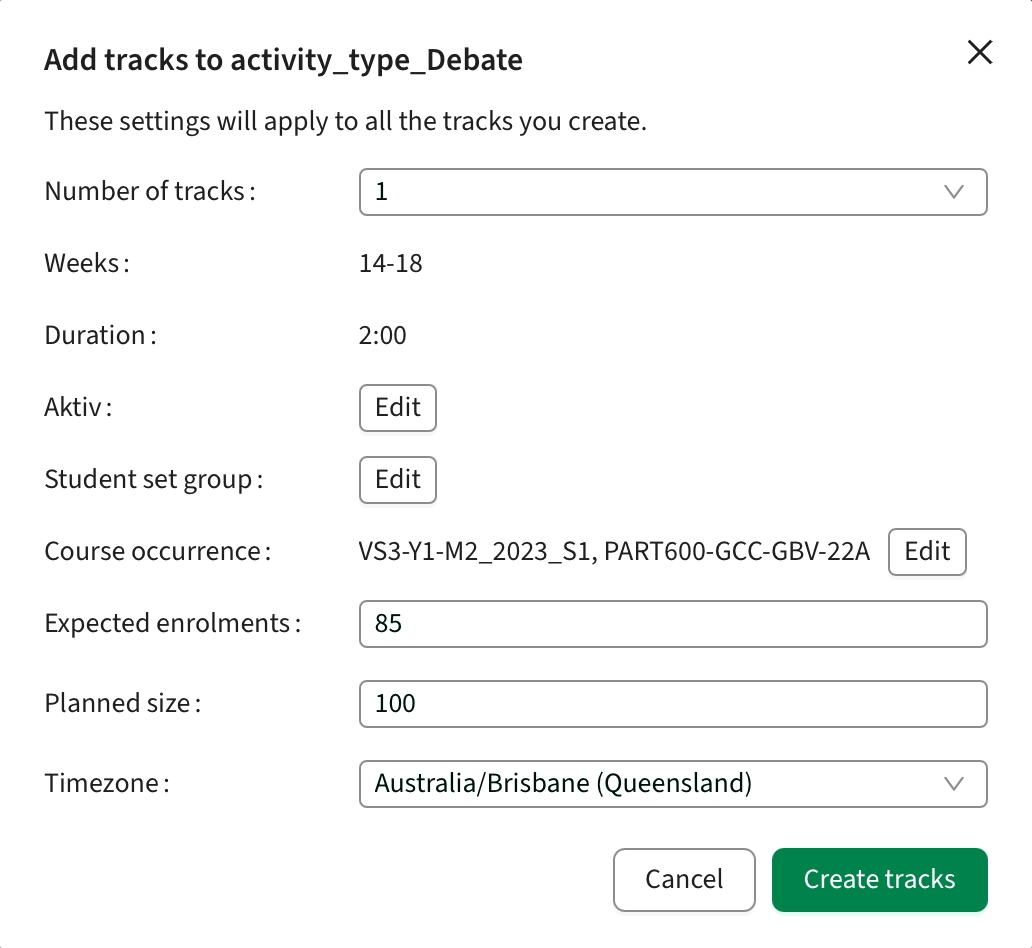
In this dialog, it’s possible to update the values of the new Tracks, the same as editing a single Track.
It is not possible to change the weeks or duration for the new Tracks. If these need to be changed, they can be updated once the new Tracks have been created.
Edit Standard Fields
Tags
Tags can be added and removed to whole Activity Series, but also specific Tracks and individual Activities.
Duration
Duration can be changed to any value but must be larger than 0:00
Weekday
One or more Weekdays can be selected. If multiple Weekdays are selected, this does not mean that the activity should be scheduled on all those days, but rather one of those days. This applies to both manual and automatic scheduling. If an activity should be scheduled on multiple days of the week, additional Activity Series should be created.
Start time
Changing the Start time, will enable the Autopilot to schedule these activities on a specific time of day.
Timezone
If multiple timezones are configured on the organisation, it’s possible to select between them on the activities. This setting affects which timezone the resulting reservation will be made in. This is particularly important when considering Daylight Savings
Edit objects/fields
Regular objects and fields can be edited.
Fields
When editing Fields, any value can be entered, but keep in mind that they must conform to the field configuration in Admin. In DM, all fields act as text fields, but some fields, like Size should only contain valid numbers. There is no validation against this at the moment.
Objects
When editing Objects, the user is presented with the Object Selection Modal
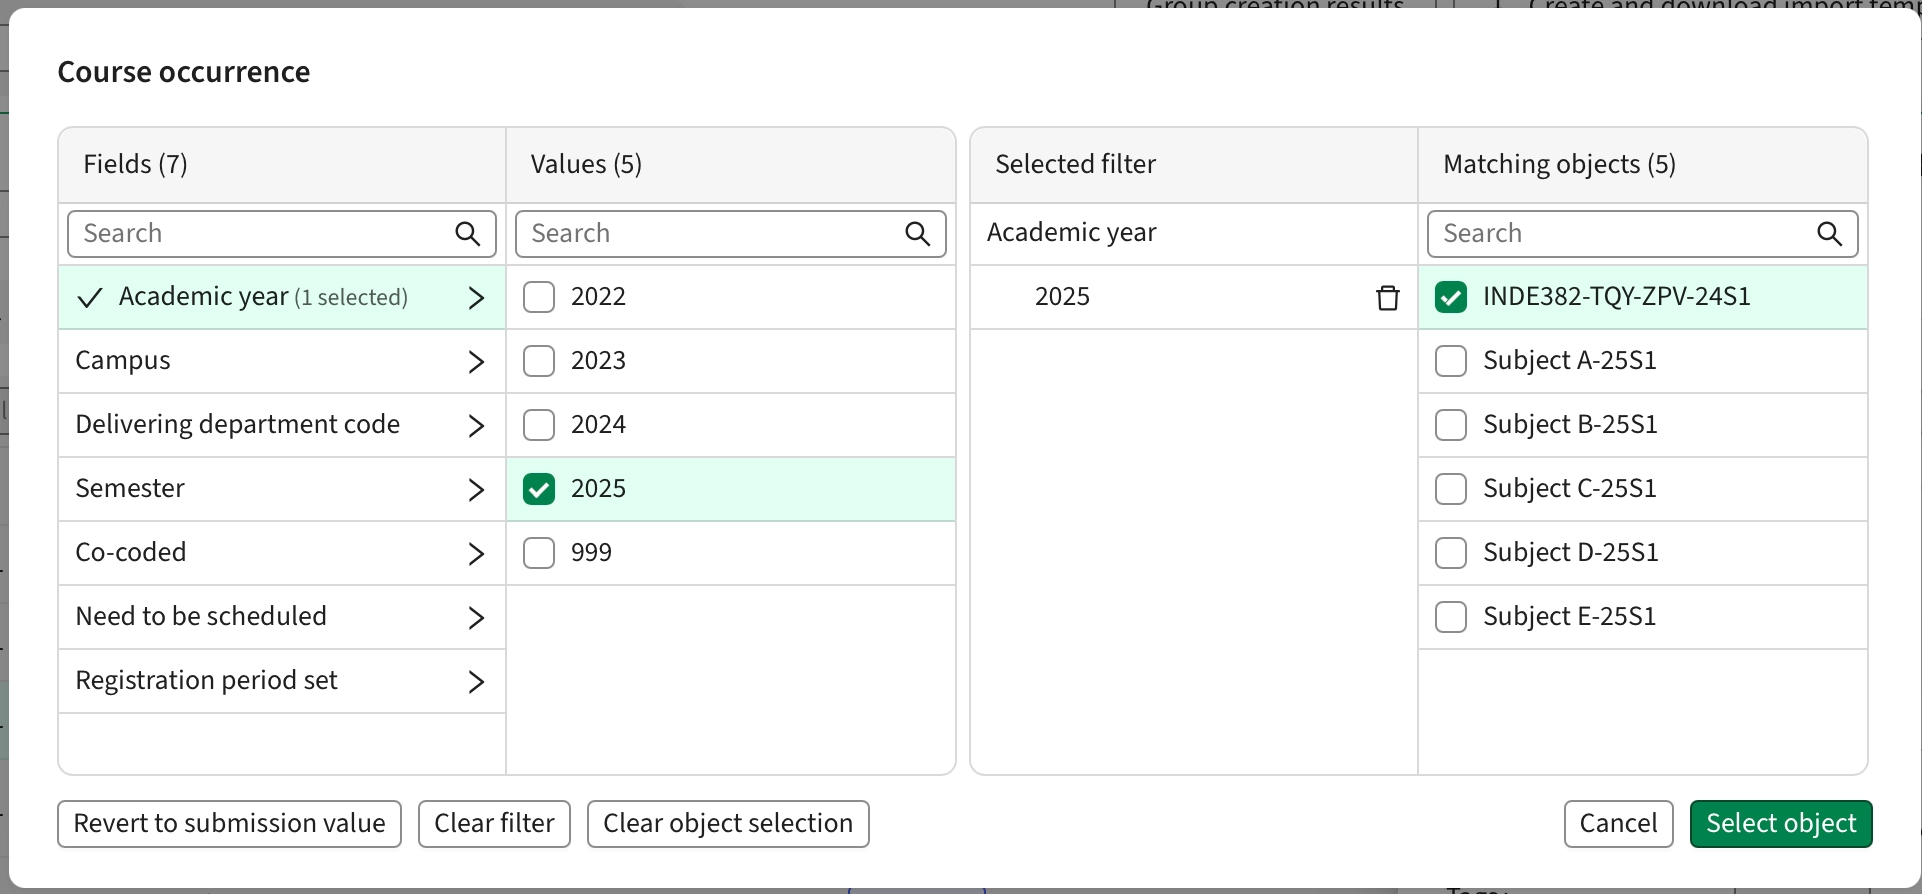
In this modal, it’s possible to filter and search for the specific Object(s) you want to apply to the Activity.
For some Object types, it’s also possible to select only a filter and not pick an object. This is mostly used for Location, where a filter should be sent to the Autopilot, but can also be used for manual scheduling.
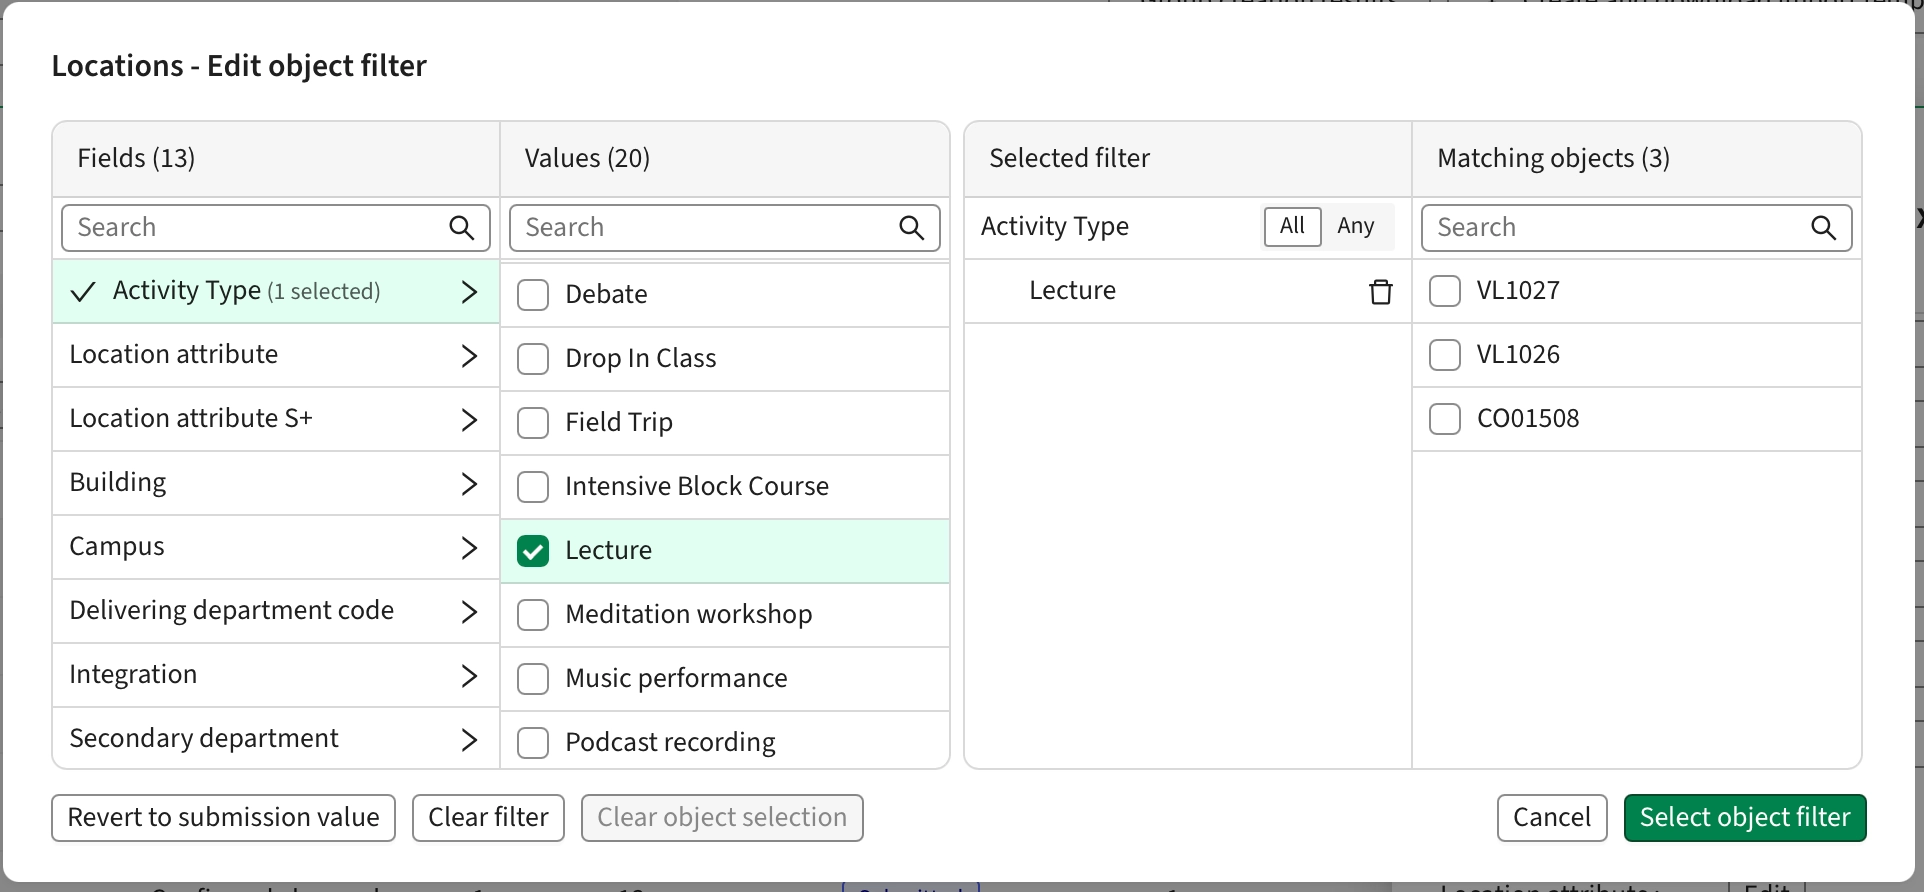
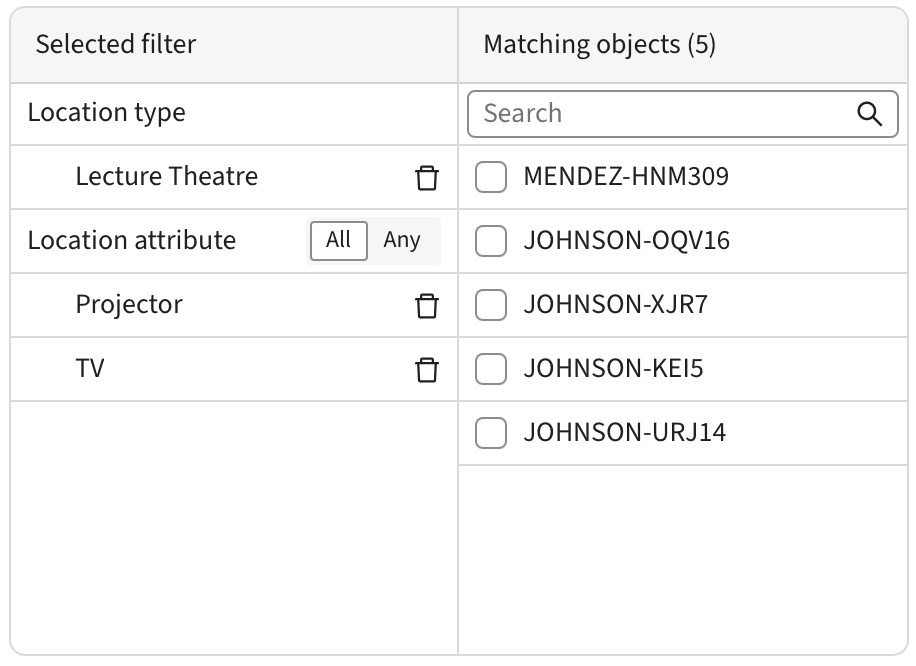
Any number of Category fields can be selected and each category can have the attribute All or Any, meaning the Location picked should have all or any of the attributes
It is possible here to revert the values to whatever was submitted from Preferences or Imported, whichever happened last (imported activities can be submitted from Preferences in a review step, in which case, the values from Preferences will be used)
Actions for selected rows
It’s possible to select individual rows in the tables. For the Activity Series table it’s possible to select - and perform actions on - one or more Activity Series, Track or individual Activities, but not a mix of the three.

Values
It’s possible to edit values in bulk, for multiple Activity Series, Tracks, or individual Activities
Selecting one or multiple rows and clicking Edit activities / Edit fields, will bring up the Bulk edit dialog
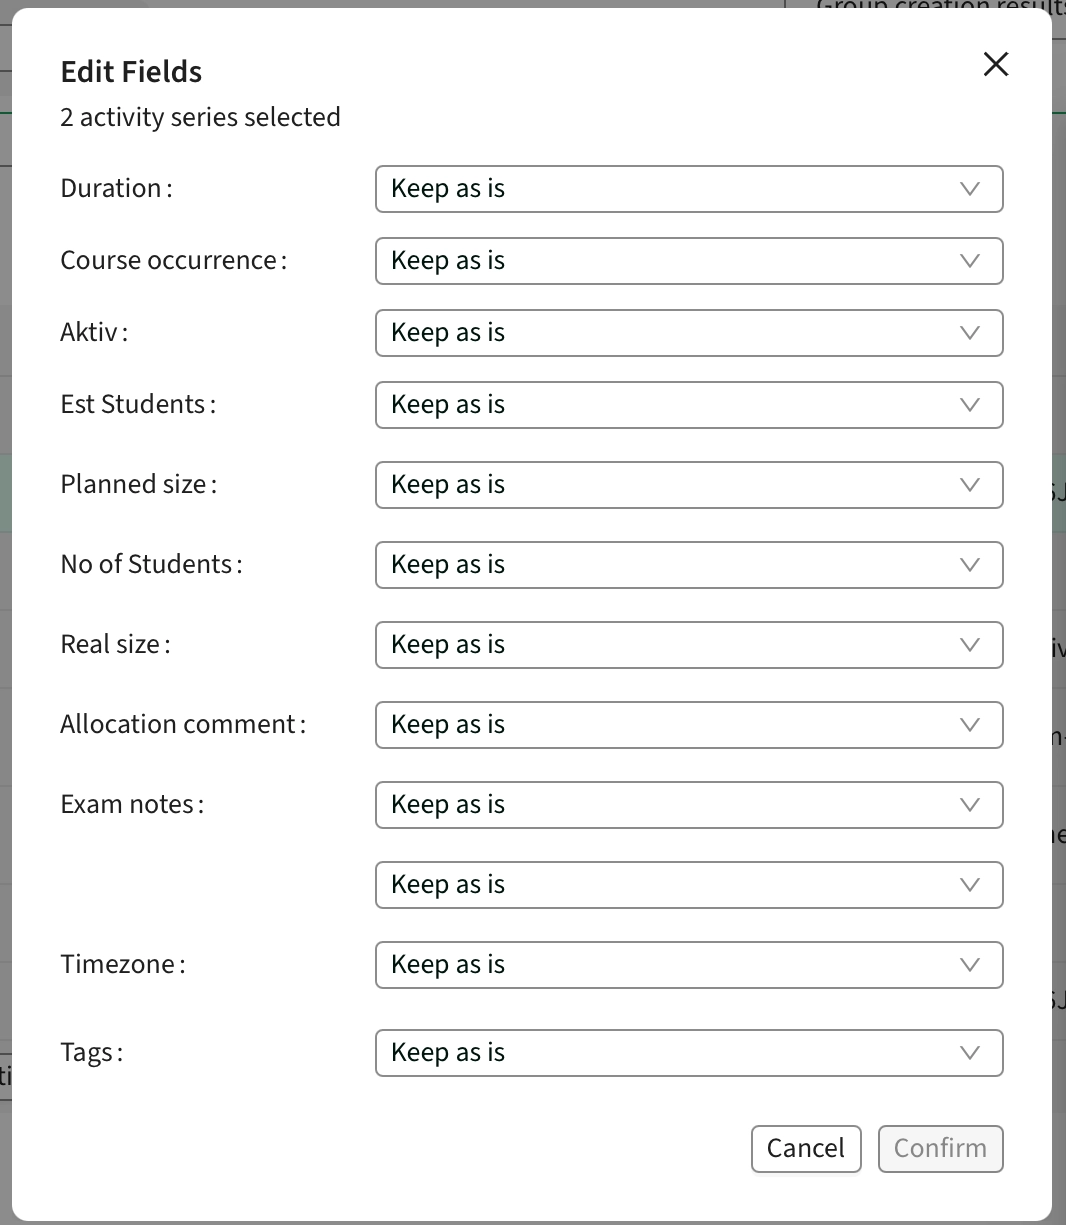
For any of the Fields, the options are "Keep as is" and "Replace"
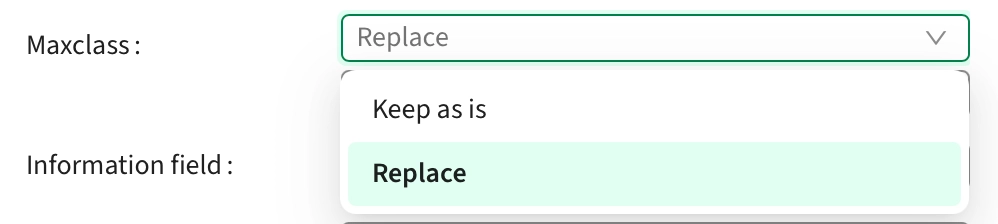
Using Replace, it is possible to Replace any existing value with a new one

For Objects, it’s possible to pick from a few different options
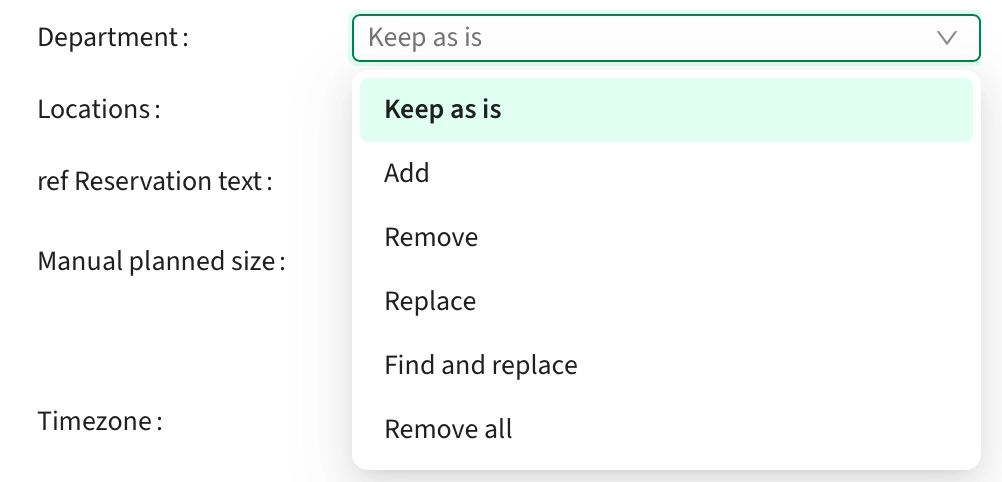
Add will add the selected object to all selected Activities, but keep any existing object
Remove will remove any selected objects from all selected Activities, but keep all others
Replace will replace any existing Objects on the Activities, with the selected Object(s)
Find and replace will replace a specific Object with a new one
Remove all will clear all Objects from all selected Activities
Weeks
This option allows the user to edit the weeks that the selected Activity Series should run for. It is only available if all selected Activity Series have the same week pattern, as it will not simply add or remove weeks, it will completely replace the week pattern.
Time constraints
Selecting either Activity Series or individual Tracks, clicking this option allows the user to add Time constraints to the selected items.
Available Time constraints are
- Same time of day
- Same day of week
- Same day and time
Sequence constraints
Selecting either Activity Series or individual Tracks, clicking this option allows the user to add Sequence constraints between the selected items.
To learn more on how Sequence constraints are used, please see the dedicated article about Sequence constraints.
Export
Selecting Export will export any selected Activity Series as a CSV file, where each Activity will be one row in the export
Delete
This will permanently delete any selected Activities
Send for review in Preferences
Selecting an Activity Series and taking this action will send all Activity Series for that Primary Object to a Form in Preferences. See linked Article for more information on this workflow.
The reason all Activity Series are sent, is because it’s not possible to review only part of a Course Instance, you need the full context in Preferences for this workflow to make sense and work as expected.
Send to Activity Manager
Selecting an Activity Series and taking this action will send the selected Series to AM, thus making it available for scheduling.
This workflow is awaiting update
Reject submission
This option is only available if the selected Activity Series is submitted through Preferences. Using this function, the submission can be rejected and will be opened for additional changes. All Activities from the submission will be locked and the status is changed to "In review in Preferences"